
Are your product images the weak link in your Amazon listing, costing you sales and holding back your brand's growth? In the crowded Amazon marketplace, your product photography is your single most powerful tool for capturing attention, building trust, and driving conversions. Getting it right is not optional for serious sellers aiming to scale from 7 to 8 figures.
To create compelling Amazon product photos, you must adhere to Amazon's technical requirements, use a full set of seven to nine images including lifestyle and infographic shots, and apply fundamental photography principles. Mastering lighting, composition, and post-processing will make your products stand out, increase click-through rates, and ultimately boost your sales and profitability in 2026.
Understanding Amazon's Official Product Image Requirements
Before you even pick up a camera, you must understand and follow Amazon's strict product image guidelines. Violating these rules can lead to your listing being suppressed or even removed, completely halting your sales. These requirements are not just suggestions; they are the foundation of a successful product detail page and are essential for maintaining a professional and consistent customer experience across the platform.
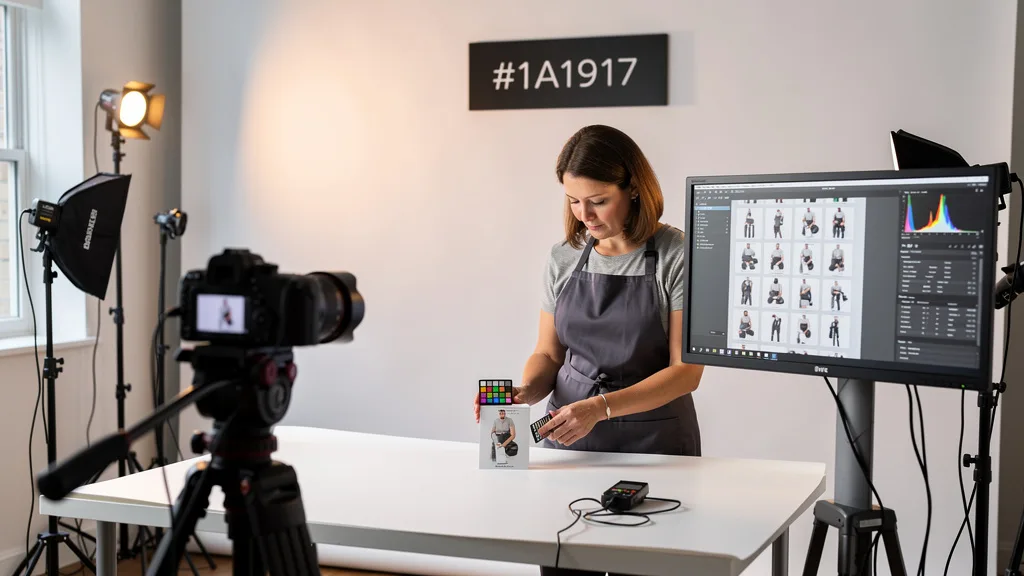
Adherence ensures your listing remains active and eligible for advertising and promotions. Think of these rules as the first step in creating a high-converting visual presentation. From the main image's background to the technical file specifications, every detail matters. Getting this right from the start saves you significant time and prevents potential compliance headaches down the line.
Main Image Rules: The White Background Mandate
The single most important rule from Amazon applies to your main image, also known as the hero image. This primary photo must feature the product on a pure white background (RGB 255, 255, 255). This requirement creates a clean, uniform look across Amazon's search results pages and ensures the customer's focus is solely on your product. The product itself must fill at least 85% of the image frame.
No additional text, graphics, logos, or props are allowed in the main image. It must be a professional, clear photograph of the product being sold. Watermarks are strictly forbidden. This minimalist approach helps customers easily compare products and makes for a better shopping experience, which is why Amazon enforces it so rigorously. Using a non-compliant main image is one of the fastest ways to get your listing suppressed.
Technical Specifications: Size, Format, and Resolution
Amazon has specific technical requirements to ensure your images are high quality and optimized for the platform's zoom feature. High-resolution images allow customers to zoom in and inspect product details, which builds confidence and can significantly increase conversion rates. Your images should be at least 1000 pixels on the longest side, with 1600 pixels or more being ideal for full zoom functionality.
Acceptable file formats include JPEG (preferred), TIFF, PNG, and GIF. You should always save your images in the sRGB color space to ensure color accuracy across different devices. Adhering to these specifications is crucial for presenting your product in the best possible light and leveraging one of Amazon's most valuable interactive features. For more in-depth information, you can review an Amazon Product Photography Guide for best practices.
| Attribute | Requirement | Recommendation |
|---|---|---|
| Minimum Size | 1000 pixels on the longest side | 1600-2500 pixels for zoom |
| Background (Main Image) | Pure White (RGB 255, 255, 255) | Ensure no shadows or off-white tones |
| File Format | JPEG, TIFF, PNG, GIF | JPEG for best balance of quality and size |
| Color Mode | sRGB | sRGB for consistent color display |
| Product Size in Frame | Must fill 85% of the image | Crop tightly around the product |
Leveraging All Your Secondary Image Slots
While the main image has strict rules, your secondary image slots offer creative freedom. Amazon allows up to nine images in total, and you should use every available slot to tell a comprehensive story about your product. These secondary images are where you can showcase your product from different angles, demonstrate its use, highlight key features, and build an emotional connection with the buyer.
Use these slots for lifestyle photos showing your product in a real-world context, infographic images that call out important benefits with text and graphics, and detail shots that focus on specific features or materials. You can also include a size comparison image to help customers understand the product's scale. A complete and varied image set answers customer questions visually, reduces uncertainty, and is a key component of effective Amazon listing optimization.
Essential Equipment for Professional Product Shots
Achieving professional-quality amazon product photos doesn't necessarily require a high-end studio, but a few key pieces of equipment are non-negotiable. The right gear helps you control light, maintain consistency, and capture sharp, clear images that look credible and trustworthy. Investing in a basic setup will pay for itself many times over through increased sales.

Your goal is to create a controlled environment where you can produce repeatable, high-quality results. This includes a capable camera, proper lighting, a clean background, and a method for keeping your shots stable. With the right tools, even a beginner can produce images that compete with top-selling brands on the platform.
Choosing Your Camera: DSLR vs. Smartphone
Many sellers wonder if they need an expensive DSLR camera. While a DSLR offers maximum control over settings like aperture, shutter speed, and ISO, the cameras on modern smartphones are incredibly powerful. For many products, a high-end smartphone from the last few years is more than capable of capturing excellent, Amazon-compliant images, especially when paired with good lighting.
The key advantage of a DSLR is the ability to use different lenses and have manual control, which is beneficial for creative shots or capturing very fine details. However, a smartphone's convenience, built-in processing, and ease of use make it a fantastic starting point. The most important factor is not the camera itself, but how you use it. Don't let a lack of a DSLR stop you from creating great product images.
Mastering Your Lighting with Natural or Artificial Light
Lighting is arguably the most critical element in product photography. Poor lighting will make even the best product look cheap and unappealing. You have two main options: natural light or artificial light. Natural light from a large window (on an overcast day is best) can provide beautiful, soft, and diffused light for free. Position your setup near the window and use a white foam board or reflector to bounce light back onto the shadow side of your product, softening harsh shadows.
Artificial lighting gives you more control and consistency, allowing you to shoot at any time of day. A basic setup with two or three softbox lights is a great investment. This allows you to implement a classic three-point lighting setup (key light, fill light, and back light) to eliminate shadows and make your product pop. Regardless of your choice, the goal is to achieve soft, even lighting that showcases your product's details without creating distracting reflections or dark spots.
Creating a Clean Background with a Sweep or Lightbox
To achieve the required pure white background for your main image, you need a clean, seamless backdrop. The two most common solutions are a photography sweep or a lightbox. A sweep is a large sheet of white paper or vinyl that curves from under the product up the wall behind it, creating a seamless background with no distracting horizon line.
A lightbox (or light tent) is a cube made of translucent white fabric with an internal light source. It provides a pre-lit, enclosed environment that bathes your product in soft, diffused light from all sides. This is an excellent all-in-one solution for smaller products, as it simplifies both the lighting and background setup, making it easy to get consistent, shadow-free results.
Stabilizing Your Shots with a Tripod
A tripod is an essential, non-negotiable tool for product photography. Even the slightest handshake can introduce motion blur, resulting in soft, unprofessional-looking images. A tripod holds your camera or smartphone perfectly still, allowing you to use slower shutter speeds in lower light conditions without sacrificing sharpness.
Using a tripod also ensures consistency in framing and angle across all your shots. Once you find the perfect position, you can lock the tripod in place and shoot all your product variations from the exact same perspective. This consistency is crucial for a professional-looking listing and a better customer experience. Always use a tripod, whether you are shooting with a DSLR or a smartphone.
Core Principles for Effective Product Photography
Beyond the technical requirements and equipment, great product photography relies on timeless artistic principles. Understanding concepts like composition and visual hierarchy will elevate your images from simple snapshots to compelling sales tools. These principles guide the viewer's eye, create visual interest, and communicate information more effectively.

Applying these rules helps you arrange elements within your frame to tell a story and highlight what's most important. They are the difference between a photo that simply shows a product and a photo that sells a product. Learning these fundamentals is a key step in mastering the craft and achieving successful product photography.
Applying the Rule of Thirds for Better Composition
The Rule of Thirds is a fundamental composition guideline. Imagine your image is divided into nine equal segments by two horizontal and two vertical lines. The rule suggests that you should place important compositional elements along these lines or at their intersections. Placing your product off-center is often more dynamic and visually engaging than placing it directly in the middle of the frame.
For your main Amazon image, you will likely need to center the product to meet the 85% frame-fill requirement. However, for your secondary lifestyle and context shots, applying the Rule of Thirds can create much more interesting and professional-looking compositions. Most cameras and smartphone apps have a grid overlay feature to help you practice this technique.
Understanding the 7 Cs of Compelling Photography
The 7 Cs of photography provide a helpful framework for evaluating and improving your images. While various interpretations exist, they generally cover critical aspects of a successful shot. Thinking through these elements can help you create more impactful and persuasive product visuals.
"To truly master Amazon product photography, focus on the 7 Cs: Context, Composition, Color, Clarity, Character, Contrast, and Consistency. These principles guide you in creating a visual narrative that not only shows your product but sells the experience, which is vital for scaling your brand."
This framework encourages a holistic approach. Context shows how the product is used. Composition arranges elements pleasingly. Color creates mood and brand identity. Clarity ensures sharpness. Character gives the product personality. Contrast makes it stand out. And Consistency across all your images builds a cohesive and trustworthy brand presence.
Using the 20-60-20 Rule for Visual Hierarchy
The 20-60-20 rule is a design principle that helps create a balanced and effective visual hierarchy, particularly useful for infographic images. It suggests dedicating your visual space in approximate proportions: 20% for a primary headline or key message, 60% for the main visual content (the product itself or a lifestyle scene), and the remaining 20% for secondary details like feature callouts or branding elements.
This structure ensures your image is not cluttered and that the viewer's attention is drawn first to the most important elements. The main visual (60%) grabs their attention, the headline (20%) provides immediate context, and the details (20%) offer supporting information for those who want to learn more. Applying this rule helps you design infographics that are easy to scan and understand quickly.
How to Take Amazon Product Photos With Your Smartphone
Taking high-quality photos with your smartphone is more accessible than ever in 2026. The key is to move beyond the default point-and-shoot mode and take control of your phone's powerful camera features. With a little knowledge and a few inexpensive accessories, your phone can be a complete product photography studio.
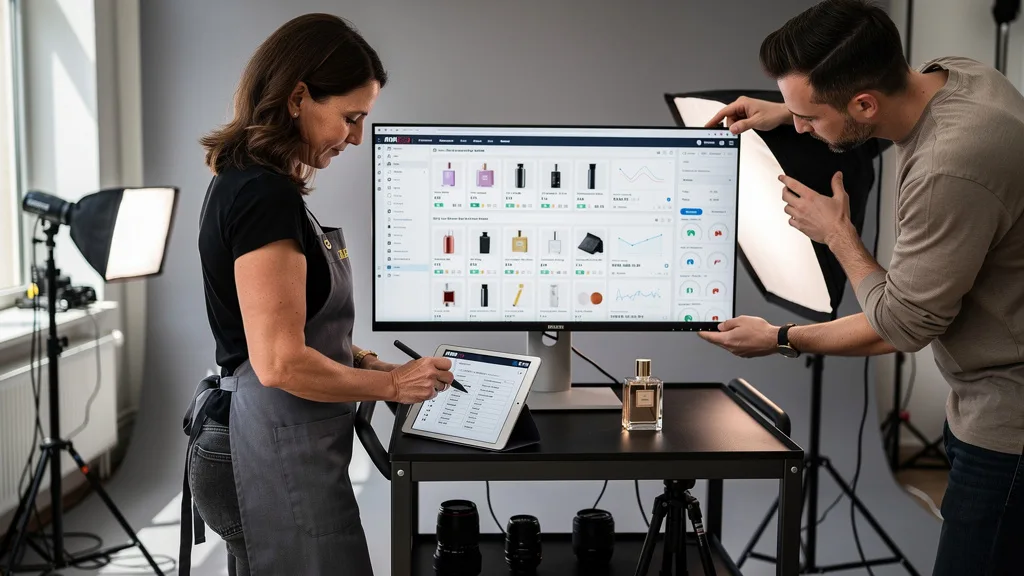
The process involves optimizing your camera's settings, finding the best possible light, and using mobile apps for editing. This approach empowers sellers on any budget to create professional-looking images that can compete on the Amazon marketplace. Following these steps will help you produce clean, sharp, and compelling product shots.
Optimizing Your Smartphone's Camera Settings
Start by diving into your phone's native camera app settings. First, ensure you are shooting at the highest possible resolution and quality. Turn on the gridlines feature; this will display a Rule of Thirds grid on your screen, which is invaluable for improving composition. Before taking a shot, tap on your product on the screen to set the focus point.
Once focused, press and hold to lock the focus and exposure (AE/AF Lock). This prevents the camera from automatically readjusting as you move slightly, ensuring consistent brightness and sharpness. Avoid using the digital zoom, as it degrades image quality. Instead, move your phone closer to the product. Also, be sure to clean your phone's lens with a microfiber cloth before every shoot to prevent smudges and dust from blurring your images.
Finding the Best Light for Mobile Photography
As with any camera, lighting is paramount for smartphone photography. The small sensor in a smartphone performs best with abundant, soft light. The best source is often natural light from a large window. Place your product on a table next to a window but out of direct, harsh sunlight. Direct sun creates hard shadows and bright hotspots.
If natural light isn't sufficient or consistent, invest in a small, affordable LED light ring or a pair of small softbox lights designed for mobile use. These tools provide the soft, even illumination needed for professional results. Always use a reflector (a simple piece of white foam board works perfectly) opposite your light source to bounce light back and fill in any dark shadows on your product.
Top Mobile Apps for Editing and Background Removal
Editing is a crucial final step. Your phone's native photo editor can handle basic adjustments like brightness, contrast, and cropping. For more advanced features, several powerful mobile apps are available. Apps like Adobe Lightroom Mobile and Snapseed offer professional-grade tools for color correction, sharpening, and selective adjustments.
For creating the pure white background required by Amazon, apps like Canva, PhotoRoom, or Fotor have built-in background removal tools that use AI to automatically isolate your product. While these tools are convenient, they may require some manual cleanup for perfect results. For complex products, you might still need desktop software like Adobe Photoshop, but for many items, a mobile workflow is entirely feasible and can yield excellent results. There are many articles with 10 tips to upgrade your DIY photography skills.
Building a Complete Image Set to Maximize Conversions
A successful Amazon listing uses a full suite of images to create a comprehensive visual sales pitch. Each image should have a specific job, from grabbing attention in search results to showcasing features and building customer trust. A complete image set answers questions before they are asked, helping to overcome buyer hesitation and improve your conversion rate, which is a core principle of advanced Amazon SEO.
By strategically planning your seven to nine image slots, you can guide the customer through a journey of discovery. You'll move them from initial interest to a confident purchase decision. This visual storytelling is what separates amateur listings from professional, 8-figure brands.
The Hero Shot: Your Primary Product Image
Your main image, or "hero shot," is your single most important photograph. It's the first image customers see in search results and the one that determines whether they click on your listing. This image must be perfect: brilliantly lit, razor-sharp, and set against a pure white background. It needs to clearly and attractively represent your product.
The product should fill 85% or more of the frame, making it appear large and detailed even in a small thumbnail. Ensure the photo is taken from a compelling angle that best showcases the product's form and primary features. This image has one job: to earn the click. Invest the majority of your effort in making this shot flawless.
Lifestyle Photos: Showing Your Product in Action
Lifestyle images show your product being used in a real-world setting by your target customer. These photos are incredibly powerful because they help shoppers visualize themselves using and benefiting from your product. They create an emotional connection and answer the question, "How will this product fit into my life?"
Choose a setting, model, and style that reflects your brand and resonates with your ideal customer. A photo of a high-end kitchen gadget should be in a modern, clean kitchen, while a rugged piece of camping gear should be shown outdoors. These context-rich images make your product more relatable and desirable, significantly boosting conversion rates.
Infographic Images: Highlighting Features and Benefits
Infographics are images that combine product photos with text and graphic elements to call out key features and, more importantly, their benefits. Many shoppers scan images instead of reading bullet points, making infographics an essential tool for communicating value quickly. Use them to highlight 3-5 of your product's most important selling points.
Use clean icons, short, easy-to-read text, and arrows to point to specific parts of the product. Focus on the benefit to the customer, not just the technical feature. For example, instead of saying "Lithium-ion battery," say "All-Day Battery Life." Well-designed infographics can dramatically improve customer understanding and are a hallmark of a highly optimized listing.
Detail Shots and Product Scale Comparisons
Detail shots, or close-ups, allow you to highlight the quality, texture, and craftsmanship of your product. Use a macro lens or your phone's macro mode to capture the fine stitching on a leather wallet, the texture of a fabric, or the precise engineering of an electronic component. These shots build trust by proving the quality you claim in your copy.
A scale comparison image is also vital for managing customer expectations and reducing returns. Show your product next to a common object (like a coin or a smartphone) or in a person's hands to give a clear and immediate sense of its actual size. This simple image can prevent negative reviews from customers who were surprised by the product's dimensions.
Post-Processing: Editing Photos for a Professional Finish
Shooting the photo is only half the battle. Post-processing, or editing, is where you transform a good photo into a great one. This stage is essential for ensuring your images meet Amazon's technical requirements and look polished, professional, and consistent. Even minor adjustments can make a significant difference in the final quality. product detail page.
The goal of editing is not to misrepresent the product but to ensure the photo is an accurate and appealing representation. This involves correcting colors, adjusting brightness, removing minor flaws, and exporting the file in the correct format. Software like Adobe Photoshop or Lightroom is the industry standard, but free alternatives like GIMP or beginner-friendly tools like Canva can also get the job done.
Basic Adjustments for Brightness, Contrast, and Color
The first step in editing is making basic global adjustments. Start by correcting the white balance to ensure your whites are truly white and colors are accurate. Next, adjust the exposure or brightness so the image is well-lit but not washed out. Increasing the contrast slightly can make the image pop and appear sharper.
You can also make subtle adjustments to saturation or vibrance to make the colors more vivid, but be careful not to overdo it. The product's color in the photo must accurately match the real-life product to avoid customer complaints and returns. These simple tweaks can take a flat, dull image and make it look bright, clean, and professional.
Retouching to Remove Dust and Minor Imperfections
Even in a clean environment, tiny specks of dust, fingerprints, or minor scratches can appear on your product and be captured by the camera. These small imperfections can distract the customer and make your product look used or low-quality. Use the spot healing brush or clone stamp tool in your editing software to carefully remove these blemishes.
This is also the stage where you perfect your white background. Even with a good setup, your background may appear light gray. Use the levels or curves adjustment tools to make the background pure white (RGB 255, 255, 255) without blowing out the details on your product. A clean, flawless image signals professionalism and builds trust.
Exporting Your Files to Meet Amazon's Standards
Once your editing is complete, the final step is to save and export your files correctly. Always save a master copy of your edited file in a lossless format like TIFF or a PSD (Photoshop Document) with all layers intact. This allows you to go back and make changes later if needed.
For uploading to Amazon, export a copy as a high-quality JPEG. Ensure the image is at least 1600 pixels on the longest side to enable the zoom feature. Set the color space to sRGB. When saving as a JPEG, you'll be asked to choose a quality level; select a high setting (around 10-12 in Photoshop) to maintain quality while keeping the file size reasonable. Naming your files logically (e.g., Brand-Product-Main.jpg, Brand-Product-Lifestyle1.jpg) will help you stay organized.
Key Takeaways
Mastering your Amazon product photography is a high-leverage activity that directly impacts traffic, conversion, and brand perception. By focusing on a few critical areas, you can create a visual experience that drives growth for your Amazon business. Here are the most important takeaways from our guide:
- Follow Amazon's Rules: Your main image must have a pure white background and fill 85% of the frame. All images must be at least 1000px on the longest side (1600px+ recommended).
- Lighting is Everything: Use soft, diffused light (natural or artificial) and a tripod to create sharp, professional, and well-lit images.
- Use All Image Slots: Build a complete visual story with a mix of hero shots, lifestyle photos, infographics, and detail shots to answer customer questions and build trust.
- Smartphones are Powerful Tools: A modern smartphone, when used correctly with good lighting and editing apps, can produce fantastic, Amazon-compliant product photos.
- Editing is Non-Negotiable: Always post-process your photos to correct color, remove blemishes, and ensure they meet Amazon's technical specifications for a polished, professional finish.
Frequently Asked Questions
How many product photos should I have on my Amazon listing?
You should aim to use all available image slots, which is typically seven to nine images, including the main image. A complete image set allows you to showcase your product from multiple angles, demonstrate its use through lifestyle photos, and highlight key features with infographics. Filling all slots provides customers with more information, builds confidence, and can significantly improve your conversion rate.
Leaving slots empty is a missed opportunity to answer a potential customer question or overcome an objection. A comprehensive image gallery is a key differentiator that separates top-performing listings from average ones. It signals to shoppers that you are a professional and trustworthy seller.
Can I use stock photos for my Amazon product images?
No, you should not use generic stock photos for your Amazon listing. Amazon's policy requires that the images are of the actual product being sold. Using stock photos is misleading and can result in listing suspension. The only exception is for lifestyle images, where you might use a licensed stock photo as a background, but the main focus must still be your own product composited into the scene.
Authenticity is key to building trust with customers. Shoppers want to see the real product they will receive. Investing in custom photography that accurately and attractively represents your unique product is essential for long-term success on the platform.
Do I need to hire a professional photographer for Amazon?
Hiring a professional photographer is an excellent option if you have the budget, as they have the expertise and equipment to deliver high-quality results quickly. However, it is not strictly necessary. By following the tips in this guide, sellers can produce their own professional-grade amazon product shots using a DSLR or even a modern smartphone.
The decision often comes down to a trade-off between time and money. If you have the time to learn and practice, DIY photography can be very cost-effective. If your time is better spent on other areas of your business, hiring a professional is a worthwhile investment that will pay for itself in higher conversions.
What is the best resolution for Amazon product photos in 2026?
For 2026, the best practice is to upload Amazon product photos that are at least 1600 pixels on the longest side. While the absolute minimum is 1000 pixels, 1600 pixels is the threshold required to fully enable Amazon's zoom feature. This feature allows customers to hover over the image and see a magnified view, which is crucial for examining details and building purchase confidence.
Uploading even larger images, such as 2000-2500 pixels on the longest side, can provide an even better zoom experience. Amazon will automatically compress and resize your images for different display purposes, so uploading a high-resolution source file ensures the best possible quality across the board.
How do I create an infographic image for my product?
To create an infographic, start with a high-quality photo of your product. Then, use an editing program like Canva, Adobe Photoshop, or Visme. Identify 3-5 key features or benefits you want to highlight. Use short, concise text to describe each benefit, focusing on how it helps the customer.
Add simple graphic elements like icons, arrows, or checkmarks to draw attention to your text. Arrange the elements using design principles like the 20-60-20 rule to ensure the layout is clean and easy to scan. The goal is to create a visually appealing image that communicates your product's value proposition in seconds.
Conclusion
Implementing these top notch Amazon product photography tips is one of the highest-return investments you can make in your brand. High-quality images directly influence your click-through rate, conversion rate, and even your perceived brand value. By moving beyond simple snapshots to create a strategic set of clear, compelling, and informative images, you provide the visual proof shoppers need to make a confident purchase. This attention to detail is what separates 7-figure sellers from the 8-figure powerhouses on the platform.
Are your current product images truly optimized to drive profit and scale your brand? If you're unsure or want an expert eye to identify hidden opportunities in your listings, we can help. Get a comprehensive, data-driven analysis of your product listings, including your images, copy, and overall strategy. Request your Free Audit today and discover the path to more profitable growth on Amazon.